Walkthrough: Integrate WealthOS KYC/AML platform in a tenant application ⚓︎
This walkthrough provides a guide to integrate wealthos KYC/AML methodology to validate investor details upon creation.
Overview ⚓︎
The KYL/AML process used by WOS is simple. Upon creation of an investor WOS System connects to the configured KYL/AML platform and submit the request.
Setting up a KYC/AML method ⚓︎
Note: You need to have a Onfido account in order to follow these steps. If you do not have one, please create one first.
-
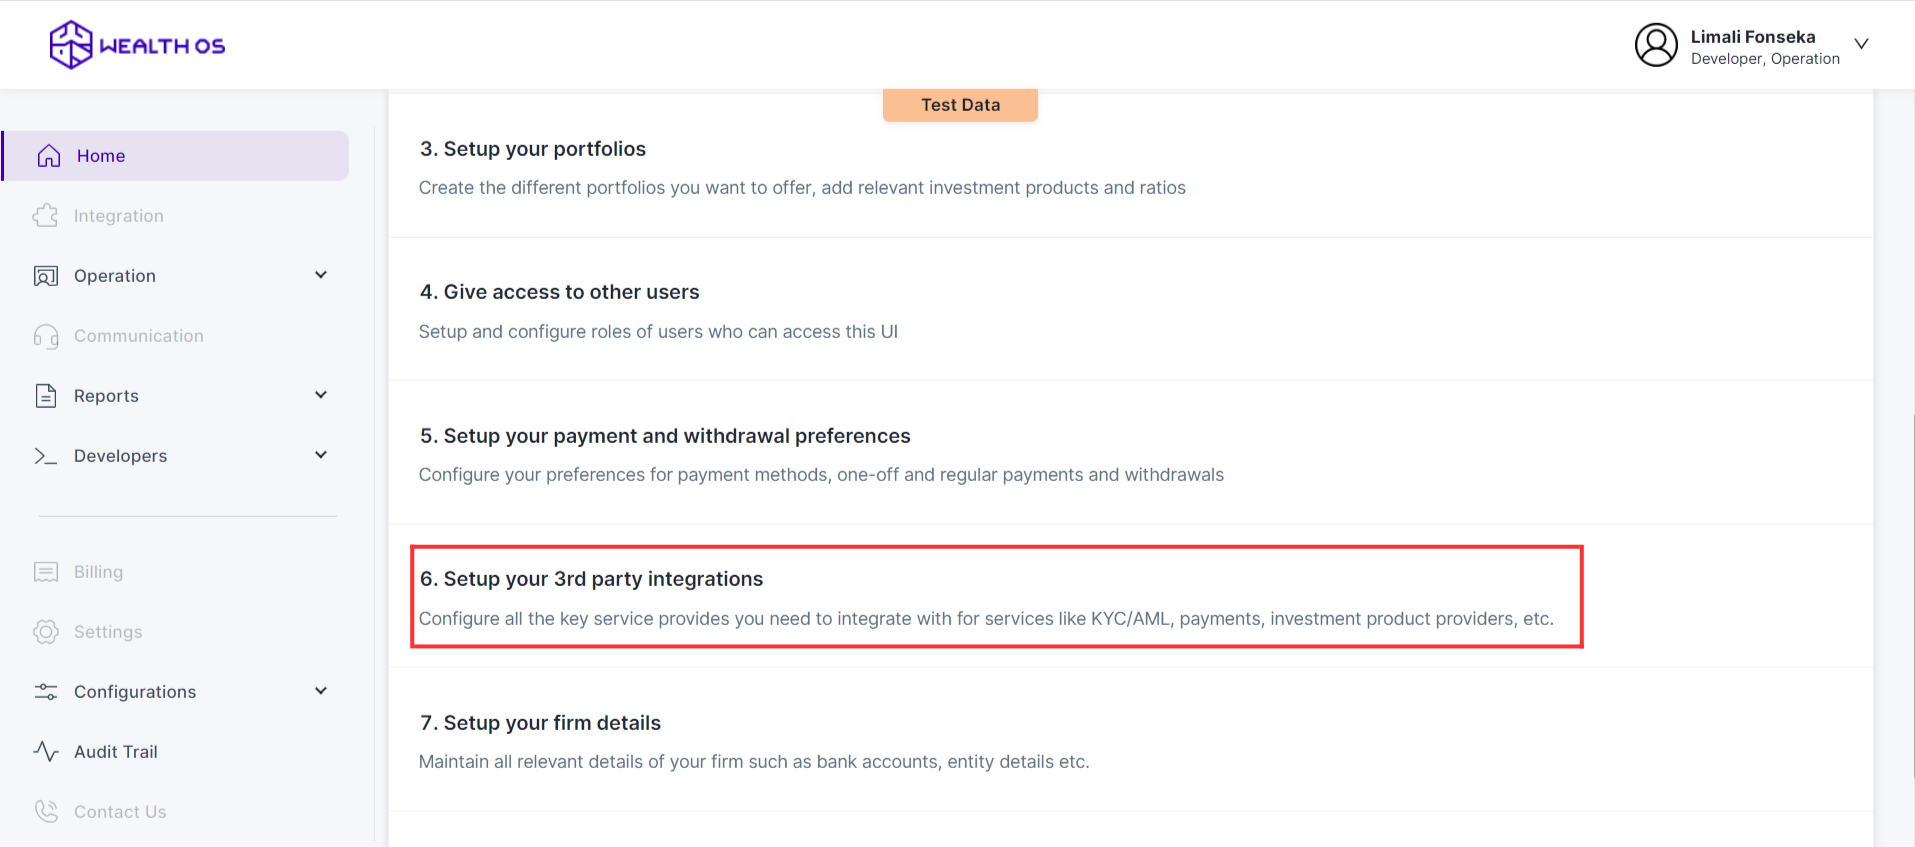
Log into the system with your credentials and select Set up your 3rd party intergrations option from Home page
-
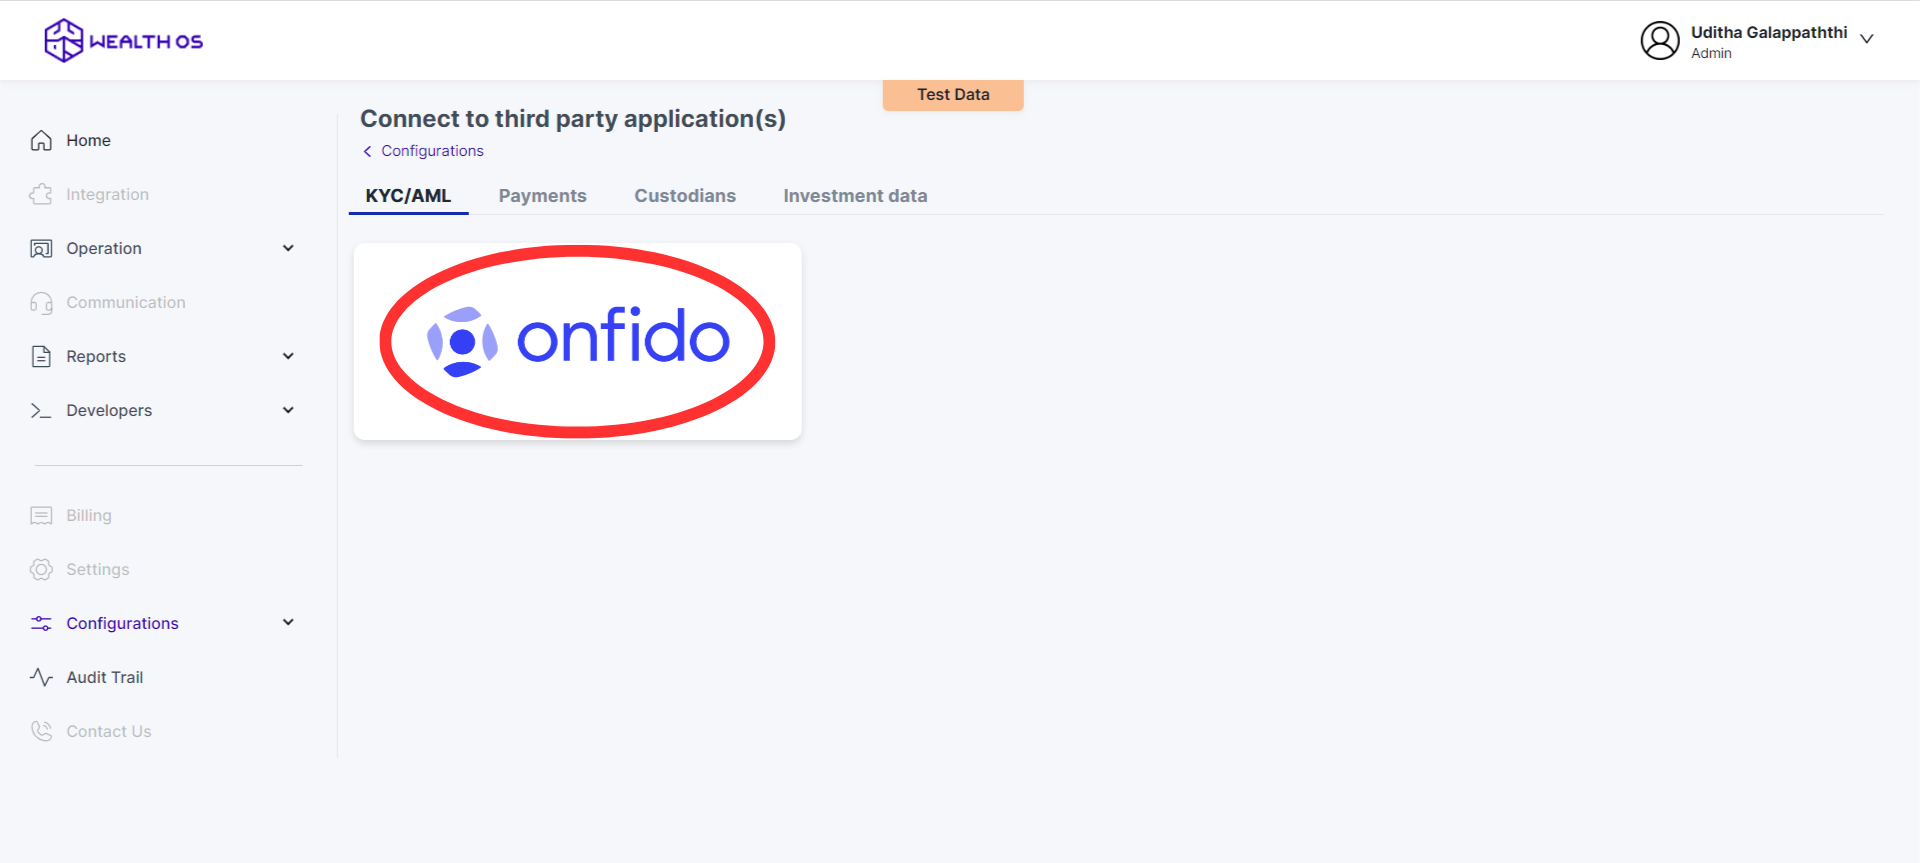
Select KYC/AML tab and select Onfido. Then you will be shown a modal with Onfido configurations.
-
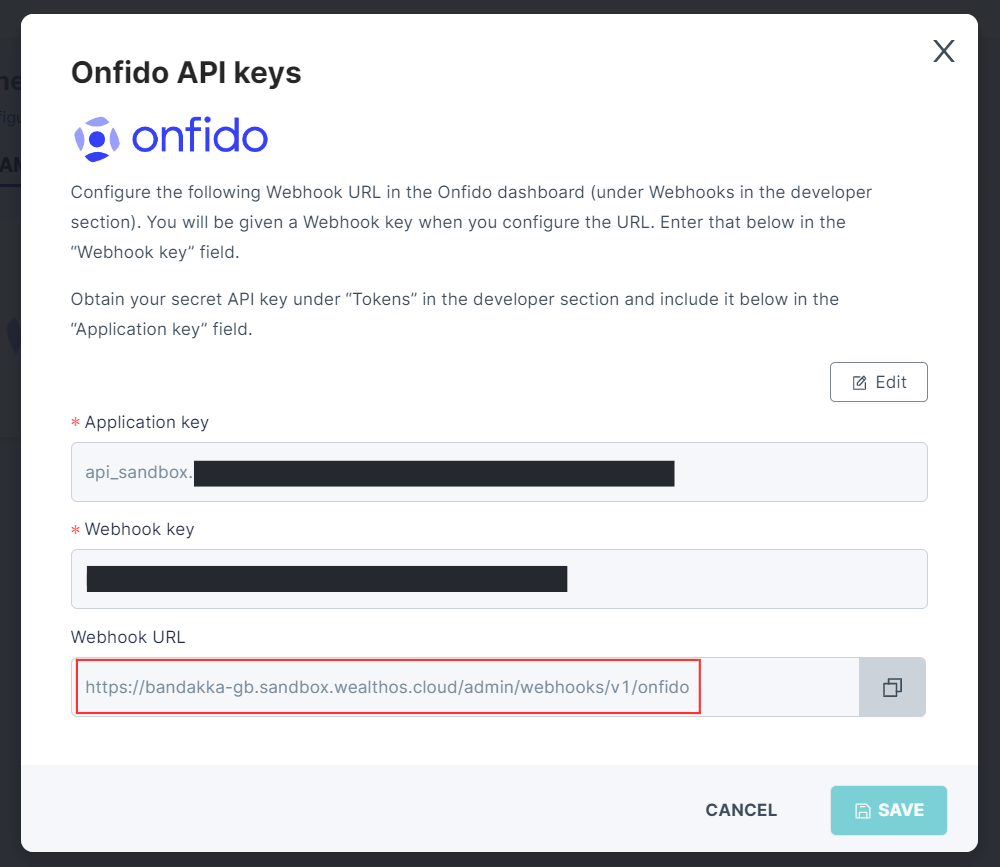
In order to configure Onfido you need two keys from Onfido, Application key and Webhook key. Both Application key retrieval and Webhook key retrieval needs some work to do. As the first step we will register our webhook in Onfido to get the webhook key.
-
Copy Webhook url from the configuration modal by clicking on it.
-
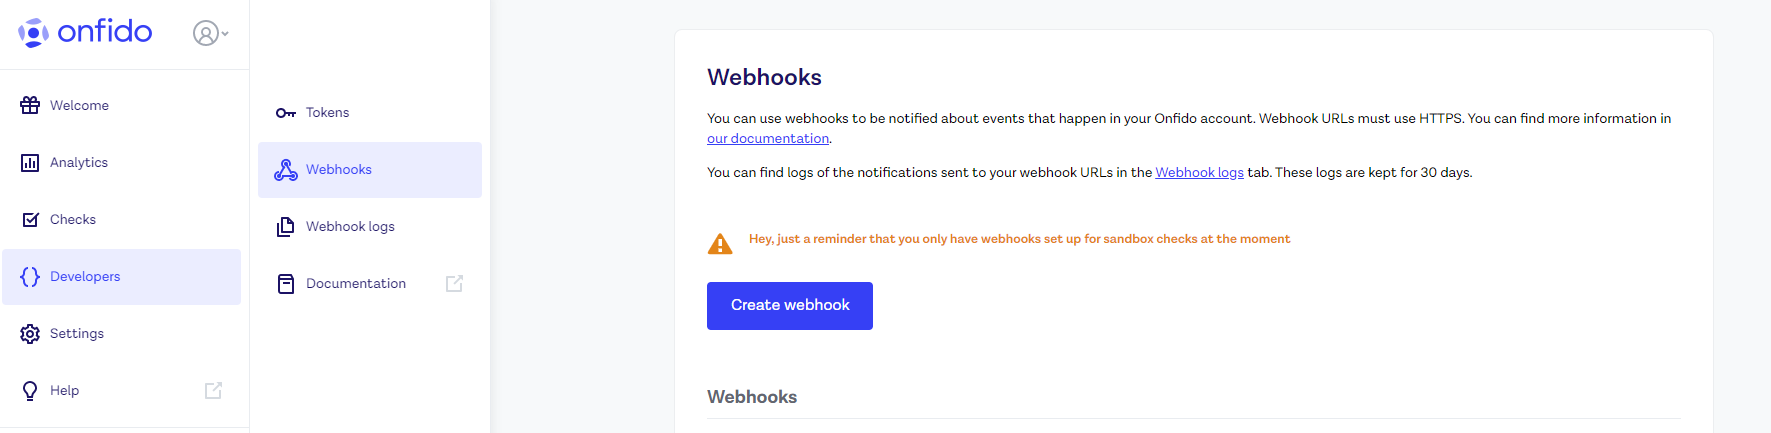
Log into Onfido with your credentials and goto Developers > Webhooks from the side menu. Then select Create Webhook to register our webhook in Onfido.
-
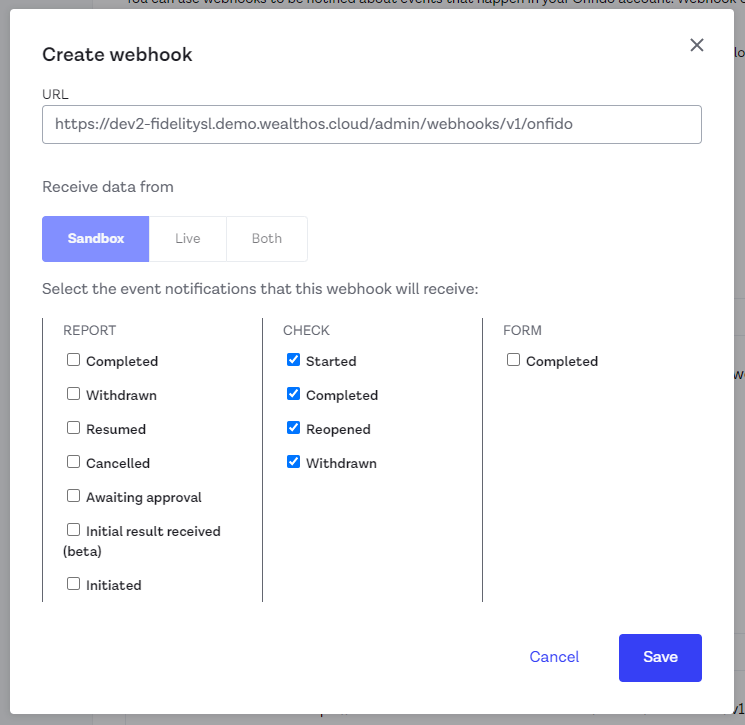
Paste the url we copied previously from our admin console to URL. Then select all the checks from Select the event notifications that this webhook will receive (highlighted below) and press Save.
-
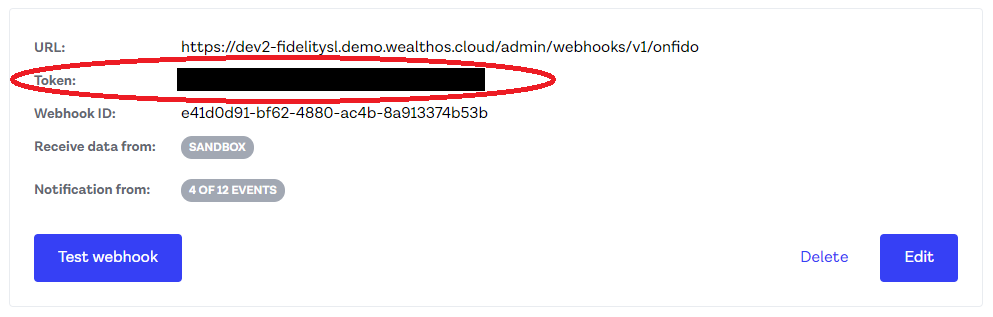
Adding the endpoint will produce a Token in Onfido. You should use this Token as the Webhook key in Onfido settings section of WealthOS admin UI.
-
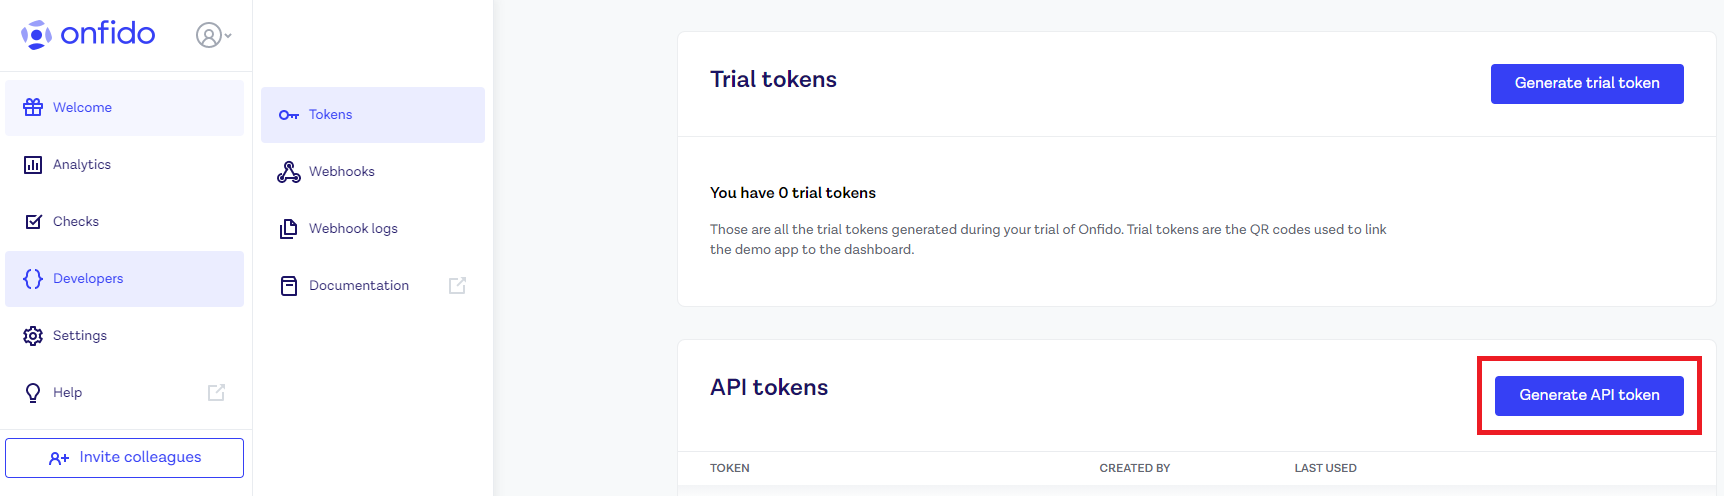
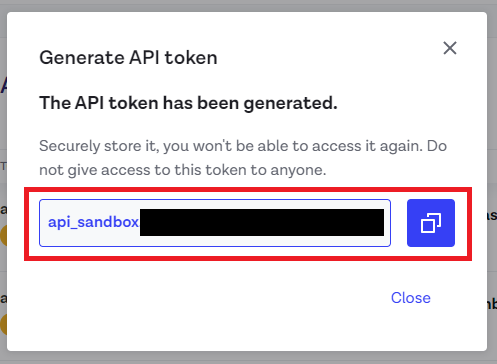
Then goto Developers > Tokens from the side menu. Then select Generate API Token to create new Token as the Application Key.
-
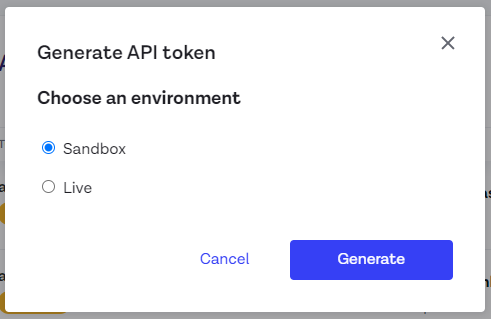
Select Sandbox or Live as the environment type depending on your requirement and press Generate the nest window will show the API Token generated in Onfido. You should use this Token as the Application key in Onfido settings section of WealthOS admin UI.
-
Come back to the WealthOS admin UI and press Change from the window shown in step 4.
-
Set both Application Key and Webhook Key generated via the steps 5 - 9 and press Save to complete.
