Walkthrough: Integrate WealthOS 'Electronic Fund Transfer' Payments in a tenant application ⚓︎
This walkthrough provides steps to integrate WealthOS 'Electronic Fund Transfer' payments methodology to add money to an existing pot managed by the WealthOS backend.
Overview ⚓︎
This integration process consists of two main stages.
- Setup TrueLayer configurations from Admin Dashboard
- Setup Wealth Manager Bank account details from Admin Dashboard
- Create Payment intent via API
1. Setup TrueLayer configurations from Admin Dashboard ⚓︎
1 - Log into the system with your credentials and select Set up your 3rd party intergrations option from Home page.
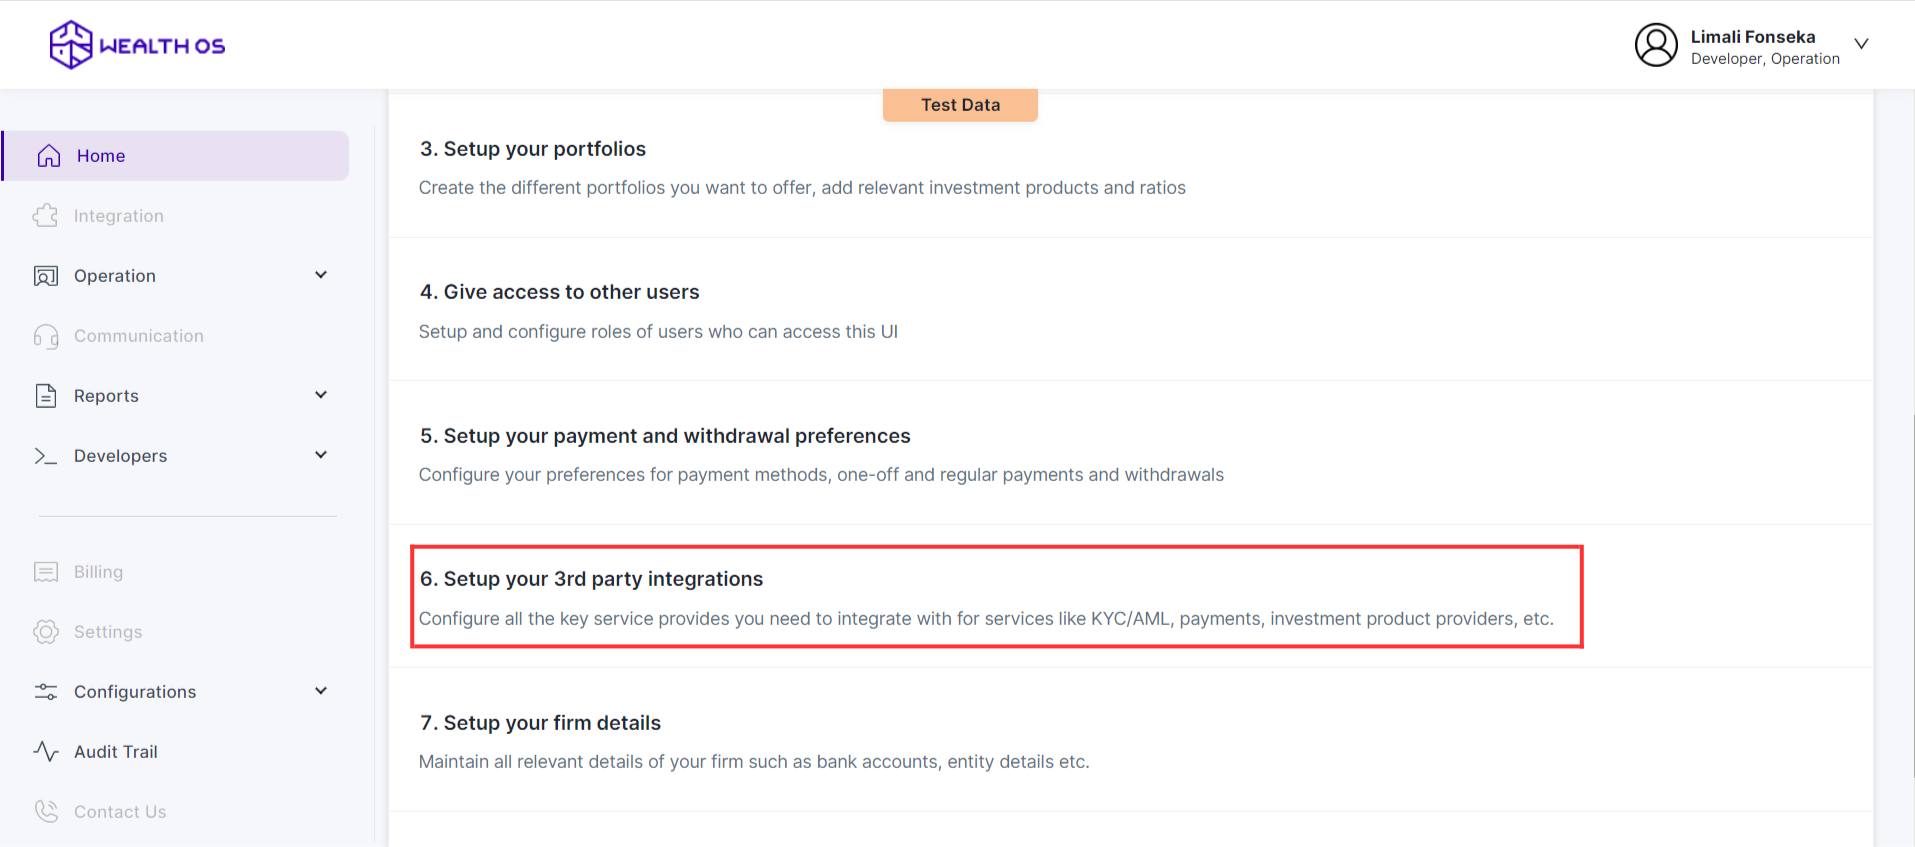
2 - Select Payments tab and select TrueLayer. Then you will be shown a modal with TrueLayer configurations.

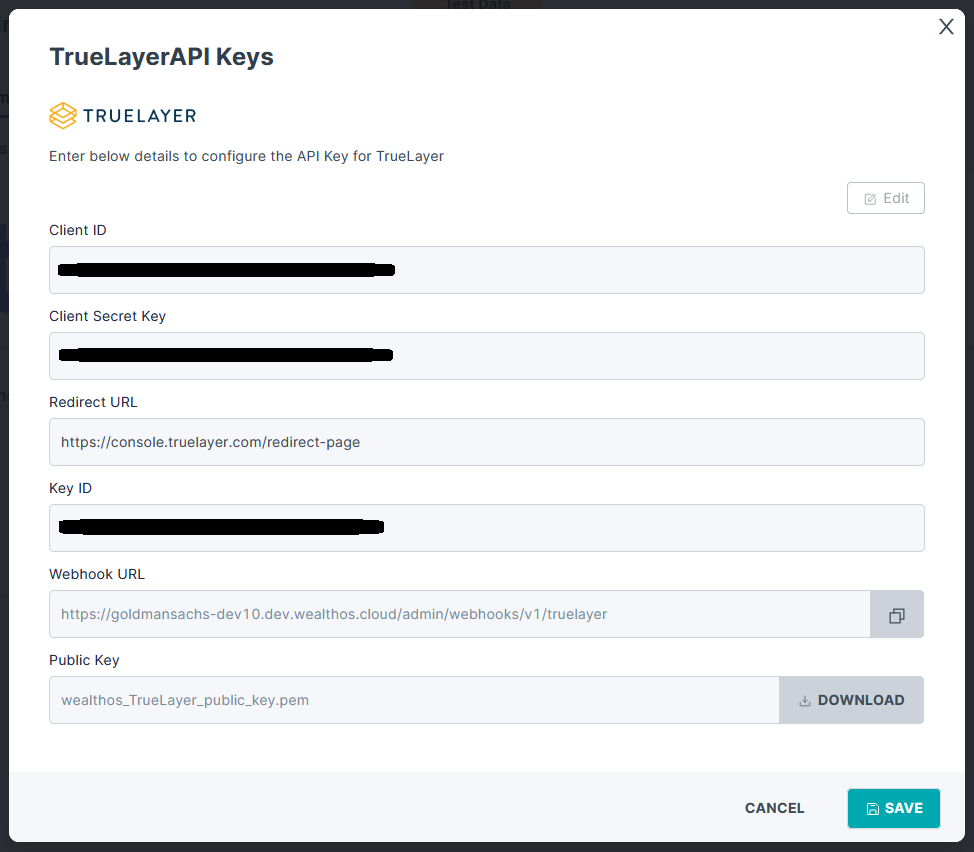
3 - In order to configure TrueLayer from the WealthOS backend, you need to obtain three fields from the TrueLayer console - ((i) Client ID, (ii) Client Secret Key, (iii) Key ID) and submit to the WealthOS backend via this window. Also, we must obtain the Webhook URL and the Public Key from this window and submit to the TrueLayer console. To achieve these, we can follow the below steps.

NOTE: Here, the Redirect URL is intended to use for redirecting the investor(s) back to the investor portal or wealth manager's application after a successful transaction. If a landing page is not available for such redirections, the default redirect URL of TrueLayer (https://console.truelayer.com/redirect-page) or any appropriate URL of your choice can be used.
4 - Client ID and Secret Key can be easily obtained by navigating to the App Settings section of the TrueLayer console as below.

Also, here, under the Allowed redirect URIs, register the same redirect URL that you provided to the WealthOS configuration window in step 3.
5 - Now download the Public Key file provided by the WealthOS configuration window in step 3 and upload it to the Payments V3 Settings page of TrueLayer console under Signing Keys. If the upload is successful, TrueLayer will provide a KID (Key ID) as a reference to this file. Copy this value and include under the Key ID in step 3.
Copy the Webhook URL from the WealthOS configuration window in step 3 and register it on the Payments V3 Settings page of TrueLayer console under Webhook URI.

6 - Now all the fields in step 3 must take a value, which means the TrueLayer configuration is complete. Press save and close this TrueLayer configuration.
7 - Now your WealthOS account has TrueLayer as a payment method.
2. Setup Wealth Manager Bank account details from Admin Dashbboard ⚓︎
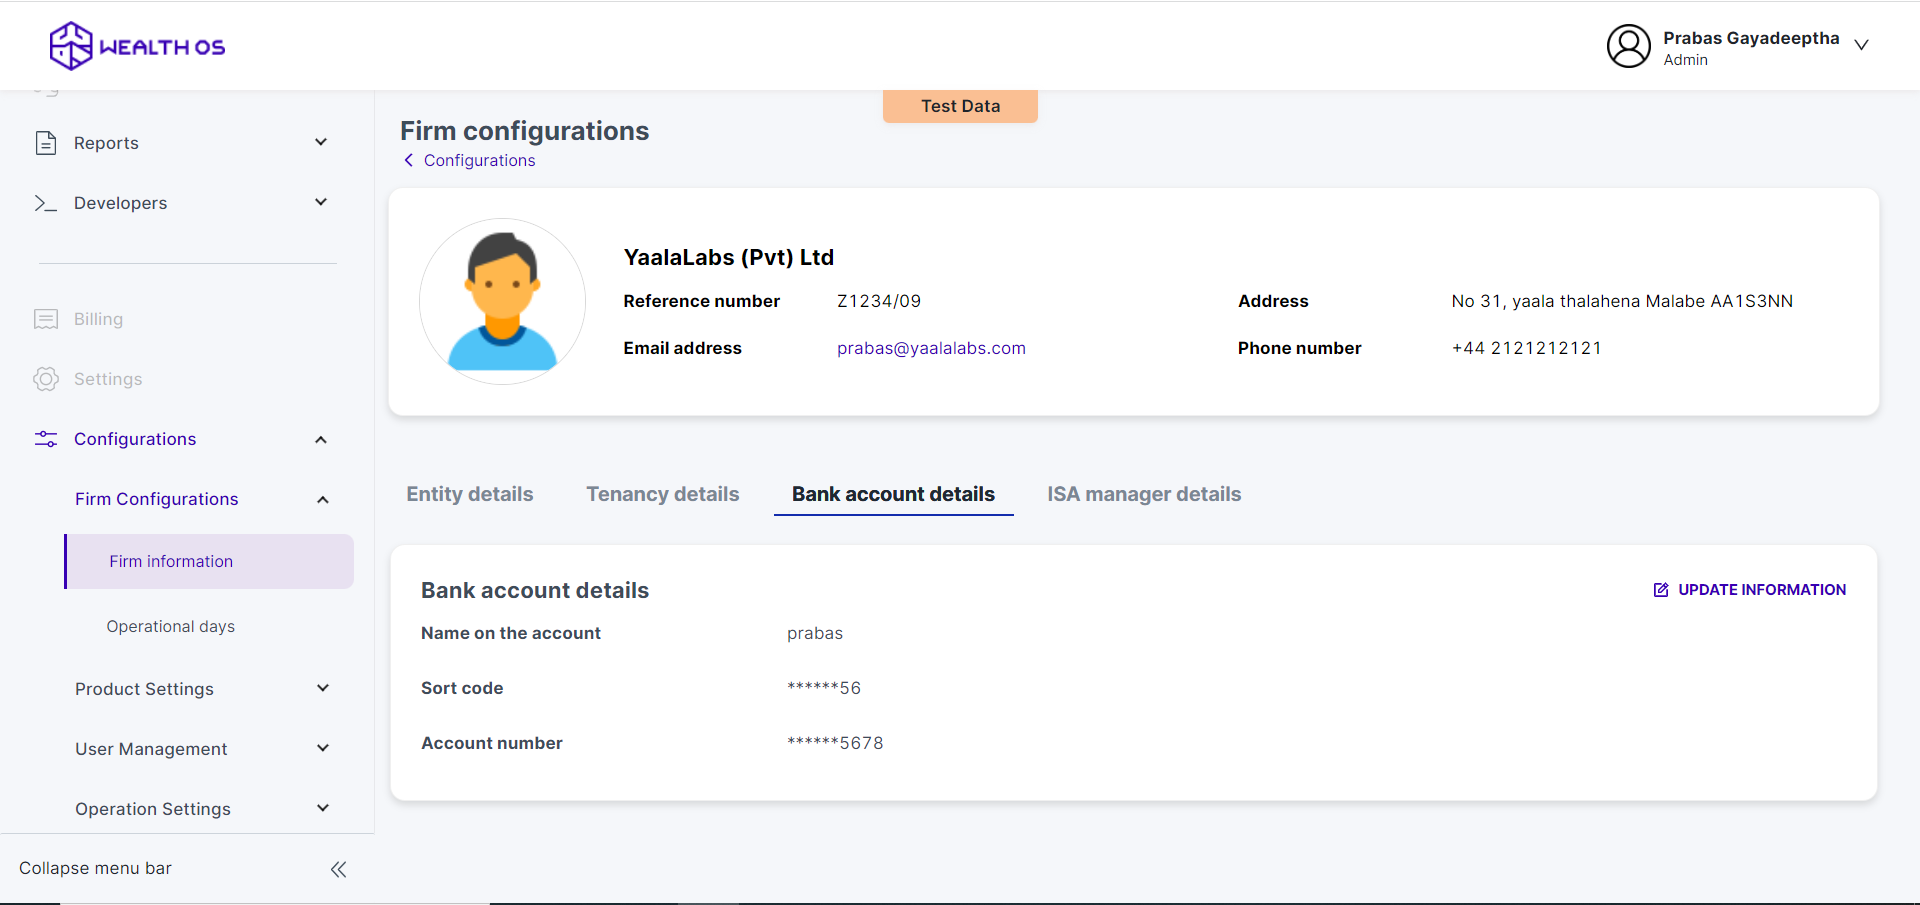
1 - Log into the system with your credentials and select Firm Configuraions option from Configurations in Home page. Make sure to log into the system as Admin.
2 - Got Firm information and select Bank account details.
- Give the Wealth manager bank account details here.
NOTE: Here, the Sort code should have 6 digits while Account number should have 8 digits according to TrueLayer validations.
3. Create Payment intent via API ⚓︎
By following the instructions in API Documentation for creating single payment intent (i.e. <WealthOS tenant origin>/payments/v1/ endpoint), we can create a payment intent.
This endpoint should only be called from your backend and for this you need to have the secret key of your tenant. This key grants the highest level of access privileges to the WealthOS platform and should be set in the x-api-key header field.
To get your key, log into the WealthOS admin console and goto Developers > Tokens section on the side menu. You can get the secret key from here,

Following is a sample code written in NodeJS to create the payment intent,
const url = 'https://dev2-abc.demo.wealthos.cloud/tenant/payments/v1/';
const paymentData = {
  "request_id": "<SOME_UUID>"
  "amount": "101.00",
  "currency": "GBP",
  "pot_id": "<INVESTOR_POT_ID>",
  "purpose": "cash",
  "payment_type": "electronic_fund_transfer",
  "service_provider": "truelayer",
  "service_provider_params": {
     "bank_account_id": "<INVESTOR_BANK_ACCOUNT_ID>"
  }
}

app.get('/create-intent', async (req, res) => {
const response = await fetch(url, {
  method: 'POST',
  mode: 'cors',
  cache: 'no-cache',
  credentials: 'same-origin',
  headers: {
    'Content-Type': 'application/json',
    'x-api-key': 'XXXXXXXX'
  },
  redirect: 'follow',
  referrerPolicy: 'no-referrer',
  body: JSON.stringify(paymentData)
});

const ret = await response.json();
res.json(ret);
});
To create a payment intent you need to send payment information. Payment data consists of following required fields,
- request_id: UUID for idempotency purpose
- pot_id: Pot that the money should be associated with
- amount: Amount that you need to add
- purpose: This should be one of cash or invest. Include cash for this.
- payment_type: This should be one of card or electronic_fund_transfer. In this case, it should be electronic_fund_transfer.
- service_provider: This should be truelayer because we configured truelayer before.
- service_provider_params.bank_account_id: this should be the bank account ID associated with the investor.
It will return a response like this.
{
    "transaction_id": "<TXN_ID>",
    "amount": "101.00",
    "currency": "GBP",
    "status": "pending_confirmation",
    "pot_id": "<INVESTOR_POT_ID>",
    "payment_type": "electronic_fund_transfer",
    "purpose": "cash",
    "service_provider": "truelayer",
    "service_provider_params": {
        "bank_account_id": "<INVESTOR_BANK_ACCOUNT_ID>",
        "payment_intent_id": "<PAYMENT_INTENT_ID>",
        "hpp_url": "https://payment.truelayer-sandbox.com/payments#payment_id=<PAYMENT_INTENT_ID>&resource_token=<TOKEN>&return_uri=<RETURN_URL>"
    }
}
Now, we can redirect the investor to the Hosted Payment Page (HPP) provided by TrueLayer via navigating to hpp_url in the above response. After the investor successfully authenticates this payment, TrueLayer will redirect the investor from the HPP to the RETURN_URL provided by us.